 |
|||
|
Alterations |
|||
|
|
 |
 |
|
|
|
|||
|
|||
|
|
|||
|
|
|||
|
|
|||
|
|
|||
|
|
|||
|
Alterations |
|||
|
|
|
|
|
|
|
|||
|
|||
|
|
|||
|
|
|||
|
|
|||
|
|
|||
|
Couplings |
|||
 |
 |
||
| to the top | |||
|
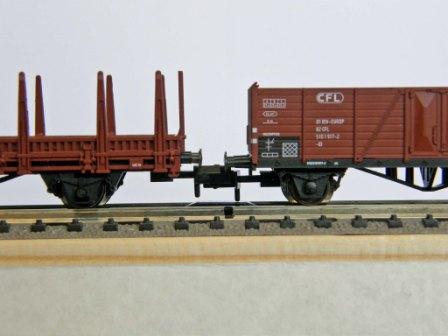
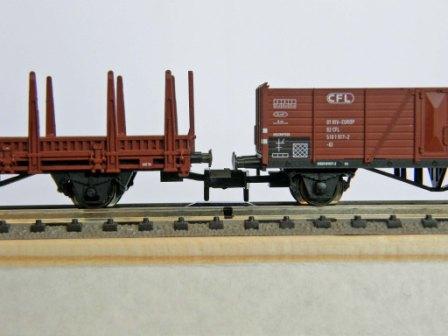
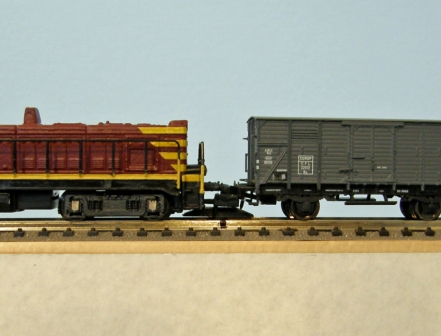
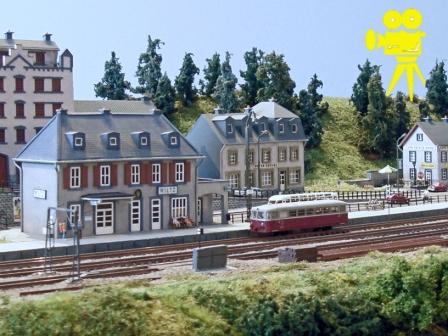
In the terminus station the locomotives have to be
separated from the trains. In the goods station waggons must be fetched
and parked. To make this possible Herkat uncouplers have been installed. They can be adjusted
exactly into the right height.The Arnold standard coupling is in use.The uncoupling can only work if the vehicles stop
exactly on top of the uncoupler. The locomotives have to drive with an extreme slowness.
|
 |
||
|
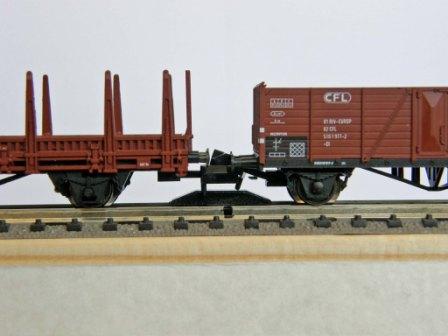
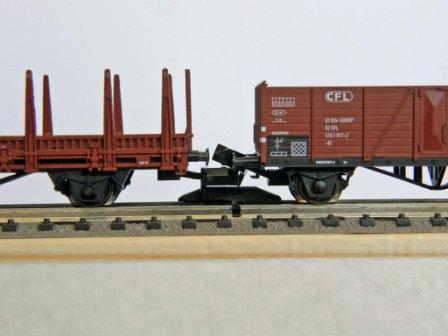
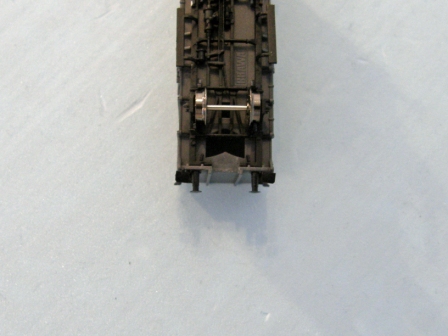
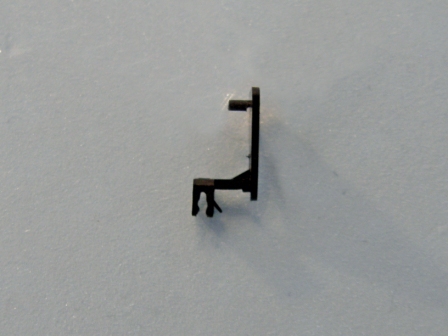
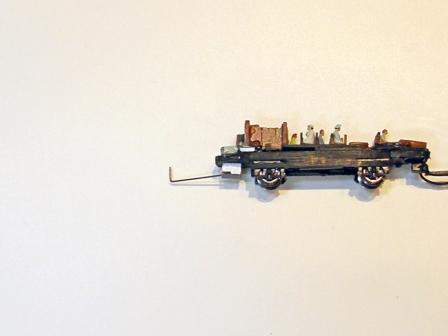
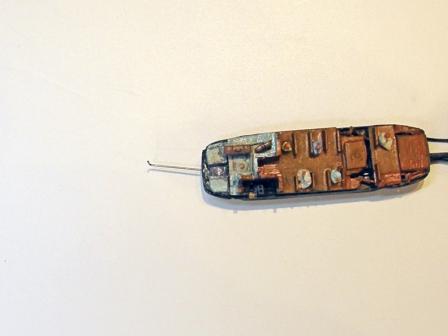
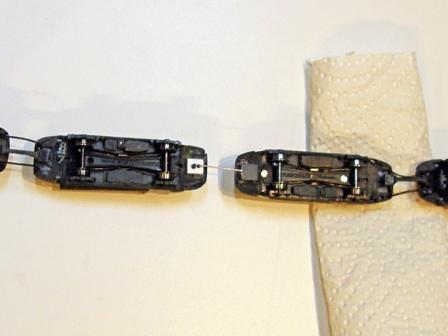
If the waggon couplings have not the same height,
I bend them carefully. Sometimes one has to work on the springs, so
that the couplings rise easily. With elder waggons the coupling
boxes may be too large and the whole waggon is raised. With newer
waggons it may occur, that the couplings don't hardly move upwards.
I then work with my miniature files. In order to do shunting, my
last solution was to replace the whole chassis. Lately I simply put
in a longer coupling.
|
 |
||
| to the top | |||
 |
 |
||
|
Covered Waggon Kw (G 10) |
|||
 |
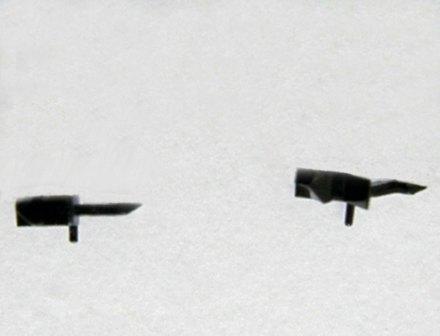
From the Brawa model I removed a small part of the
chassis above the couplings with my Roco saw and my miniature files. With a 10/0 paint brush I put Humbrol 27 colour upon the white
plastic. Within the coupling boxes I bent the small peg in the
middle by 45 degrees upwards. Now my waggon is perfectly able to couple
and with my Herkat uncouplers to uncouple on a straight track. The
nervous stress to reput the springs of the coupling kinematics during the assemby
however is quite important.
|
||
| to the top | |||
 |
 |
||
|
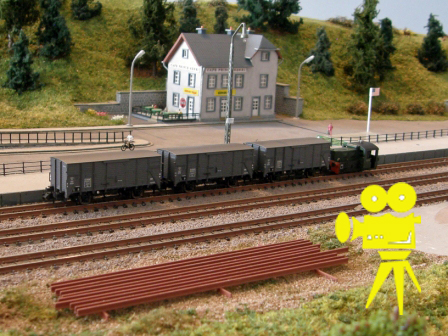
Beerwaggons Kwf and Kw (G 10) |
|||
|
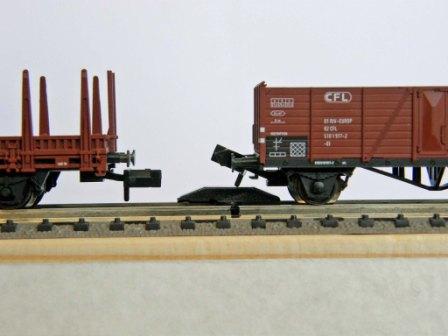
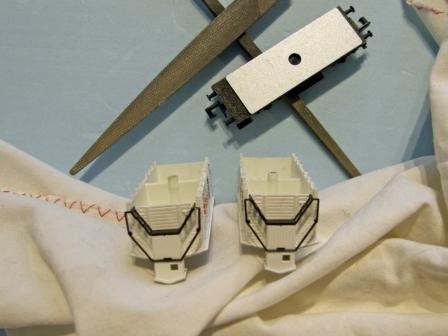
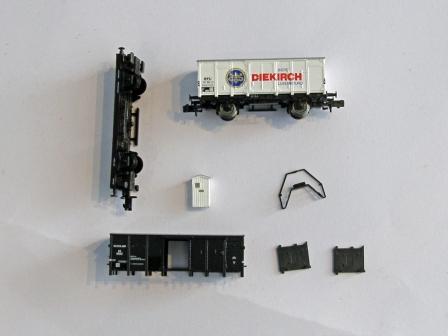
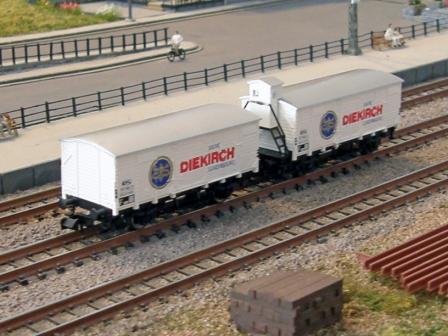
2 Arnold 4262 models received the
chassis of the HN6353 and the Fleischmann 8591. To make the bodies
suitable, I filed plastic from the crossbeams inside. The screw
tubes were also shortened. On the new chassis I covered the original
inscripions with black paint. Above the running boards I wrote CFL
with Microscale 70101 letters. Finally
the lateral part of the chassis received a thin Humbrol satin cote.
I removed the brakerman's house from one body. The roof was filled
with 0,75 mm plastic and a silver Microscale decal was placed upon.
|
 |
||
| to the top | |||
 |
 |
||
|
Open Waggon Es |
|||
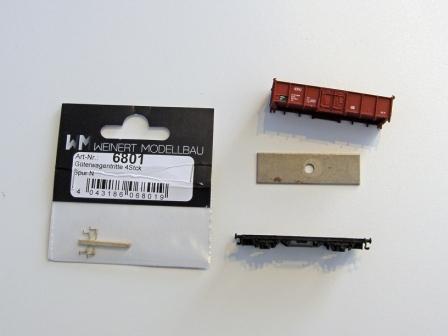 |
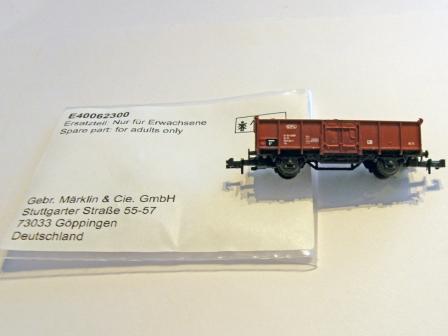
I removed the shunting stepping boards on the
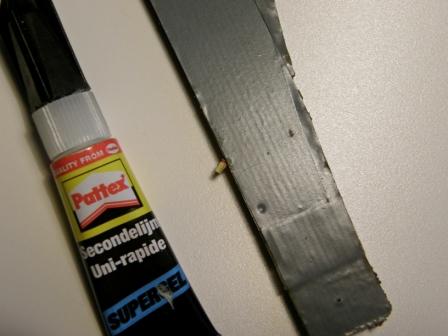
chassis of the Roco 25084 model. A 0,3 mm hole was drilled next to
the left buffer and the Weinert 6801 item was fixed with instant
glue in gel. I painted the chassis and the Weinert parts with
Humbrol 33 and sealed them with satin transparent colour. As I do a
lot of shunting and as the coupling boxes are too close above the
uncoupler, I installed the longer Minitrix E40062300 coupling. On
the plastic support I glued crashed genuine coal.
|
||
| to the top | |||
 |
 |
||
|
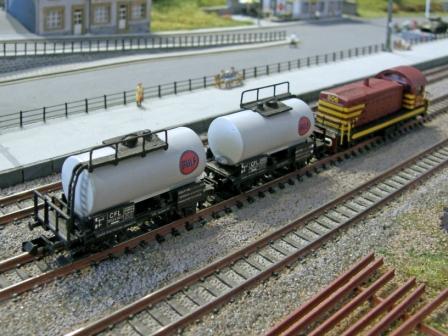
Tankwaggon Ukk |
|||
|
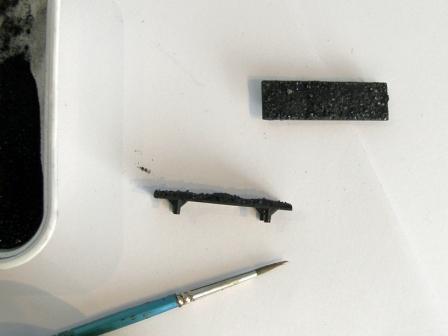
2 black plastic sheets of 0,5 X 10 X 3 mm were
fixed to the chassis of the Minitrix 18084 model by instant glue in
gel. After this I flatened the right buffer plate and painted the
whole thing with Humbrol 33.
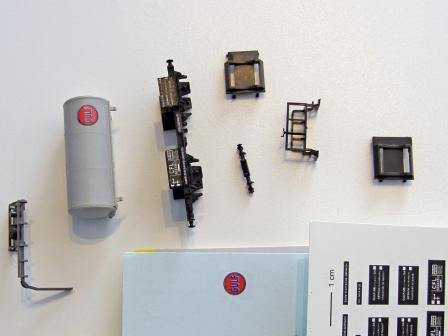
All inscriptions of the original tank were removed with 1200
sandpaper. I developed new inscriptions and the Gulf logo with Adobe
Illustrator and printed them by laser on 13 μm decals. Beneath
the chassis inscriptions I fixed slightly smaller white 13 μm decals.
I made the railings on the tank out of 0,4 mm wire and Evergreen
stripes and painted them in black. The waggon was sealed with
transparent satin colour.
|
 |
||
| to the top | |||
 |
 |
||
|
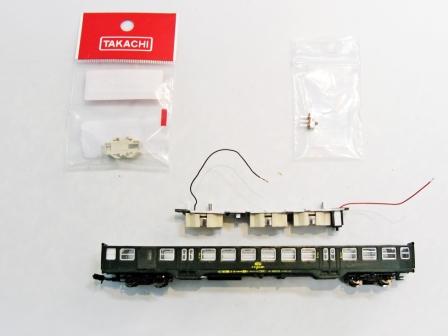
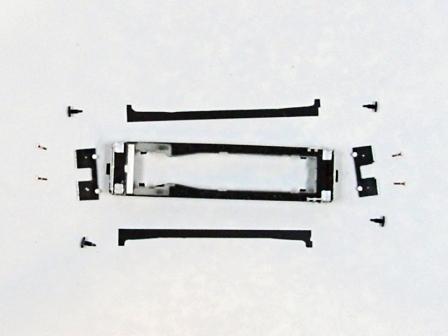
Passenger and luggage coach BD |
|||
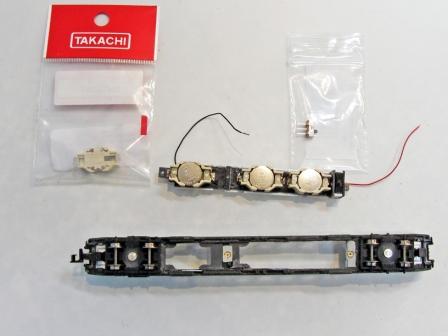 |
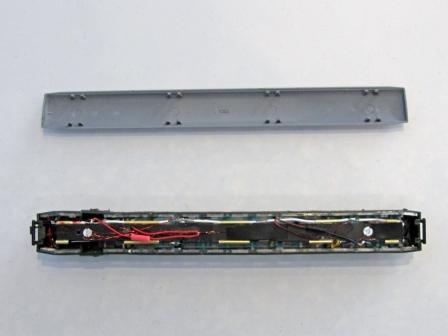
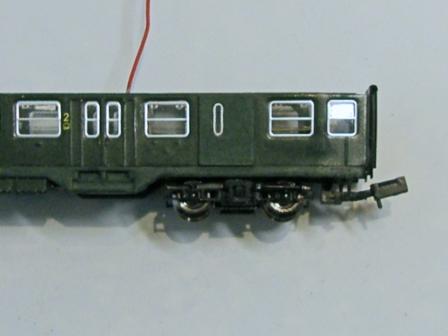
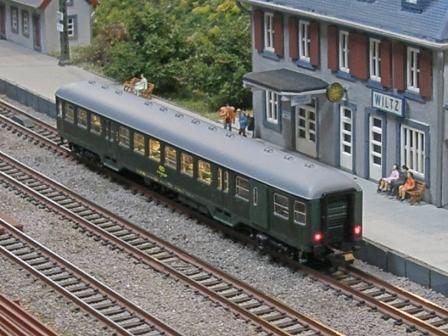
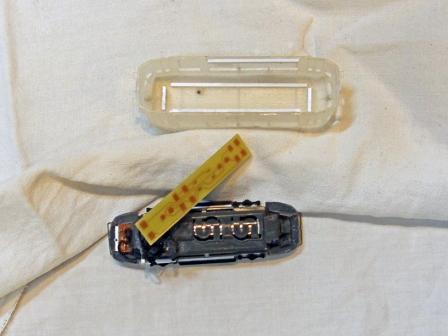
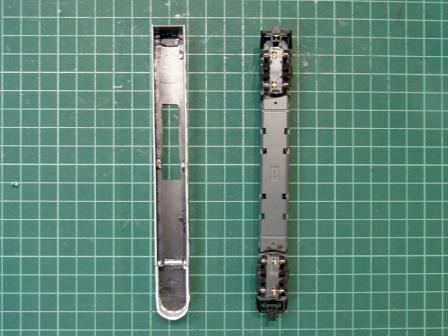
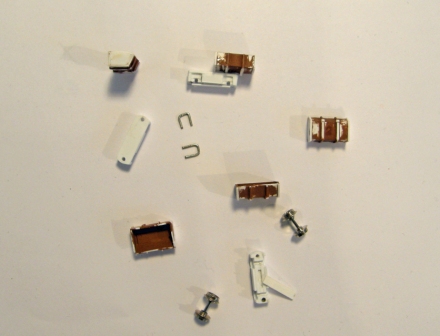
In 1991 the Fleischmann model 8142 was equipped with
two doors of 0,25 mm plastic sheets. It was painted in green and
recieved Letraset lettering by Paul Gemmer. In 2022 I installed new
bogies from
3Dprint4Moba. Thus the coach lies 1 mm deeper. A long Modellbahn
Union standard coupling was plied upwards and its peg was shortened. From the waggon ground I
removed the metal plate and by sawing and filing made place for 3
battery holders and a switch.These were glued onto a reinforced 0,5
mm sheet. The whole thing is fixed by 1 mm screws and nuts to the
waggon.
|
||
| to the top | |||
 |
 |
||
|
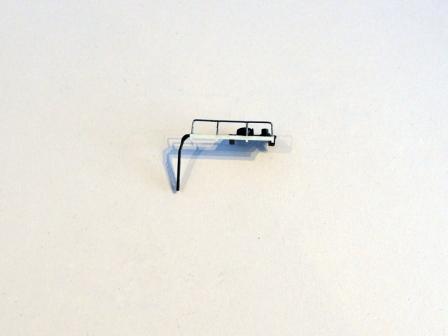
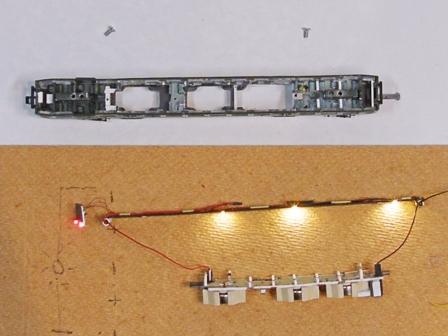
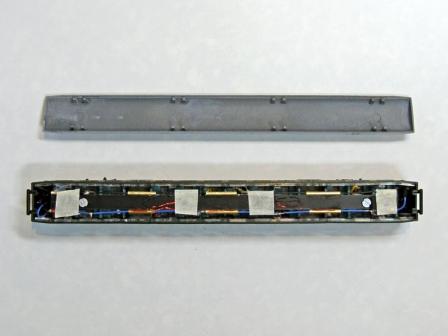
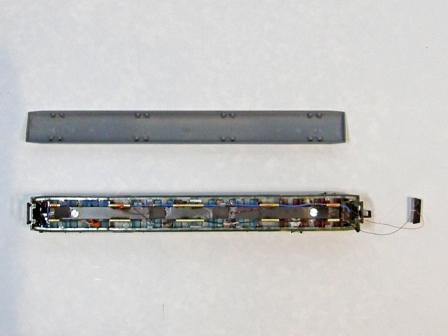
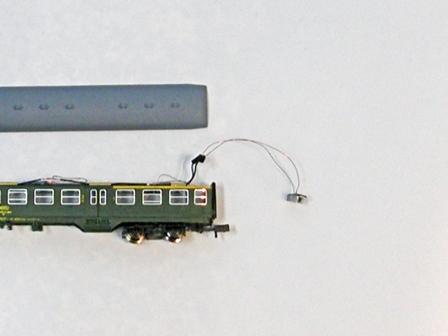
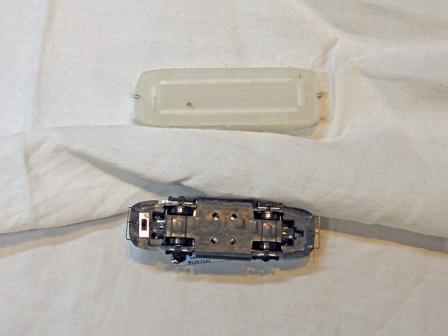
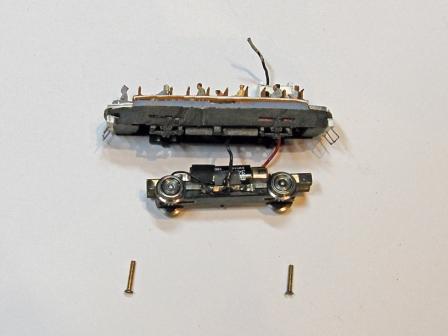
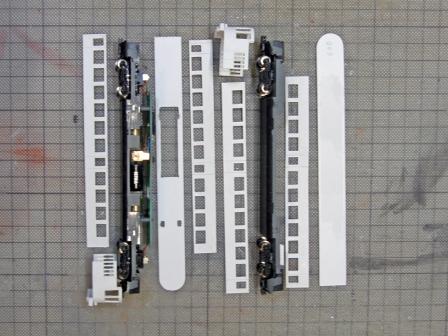
Thus the train has constant light current without the
rolling resistance of sliding contacts. I drilled holes into a 0,5 mm plastic sheet and
glued brass tubes on both sides. I soldered 5 Schönwitz 603 LED with cables
onto 2 flex cables. These have been soldered to the cables of the
3Dprint4Moba magnetic couplings.This self-made light strip
is fixed by screws onto the original Fleischmann angle irons. Thus the whole thing can easily be removed and replaced.
|
 |
||
| to the top | |||
 |
 |
||
 |
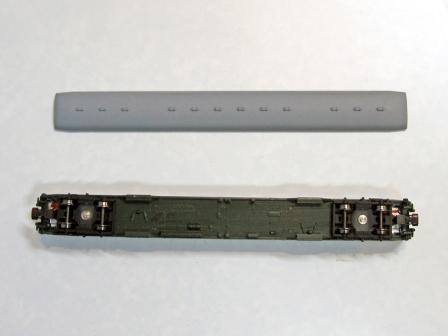
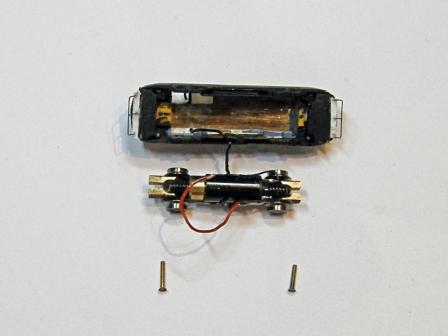
There is no LED in the luggage compartment. Here I fixed 0,4 mm brass wire behind the 3
windows concerned. The window frames of the door are bended 0,4 mm
wire. The steps
beneath the door have been glued on to the bogie. The shunting steps are Weinert items. I painted the replaced parts with Humbrol colours. The shunting
handles are Microscale decals. The passengers are "amputated"
figures from many manufacturers. I designed train destination plates
with Adobe Illustrator and printed them on white stickers.
|
||
| to the top | |||
 |
 |
||
|
Passenger coach B |
|||
|
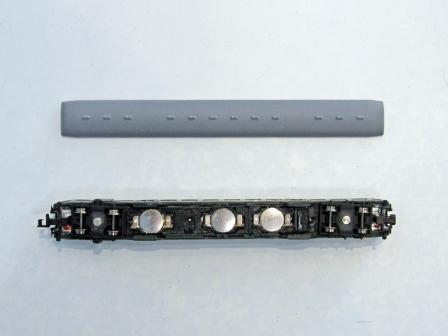
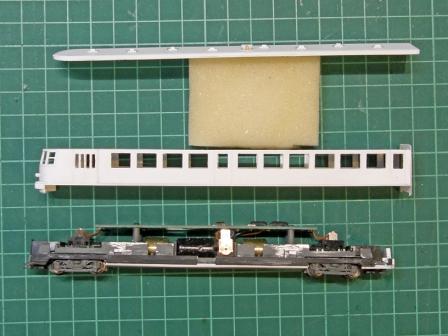
In 1991 the Fleischmann model received green
painting and CFL letterings. In 2022 I installed 3Dprint4Moba bogies
and magnetic couplings. 4 Schönwitz warm white LED have been
switched in paralell and fixed on a self-made plate. The 3 switched
in series 1,5 v batteries in the BD coach allow the operation of 20
LED. This is sufficient for a set of 4 coaches. In order to join the
waggons correctly together, there are signs in red colour on the
floors and on the couplings. I also glued 4 brass shunting steps to
the B coach.
|
 |
||
| to the top | |||
 |
 |
||
|
Passenger coach AB |
|||
 |
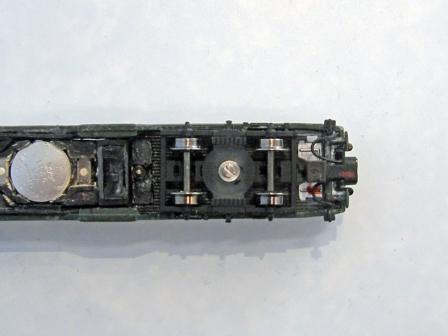
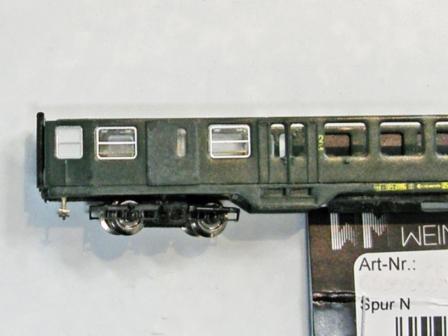
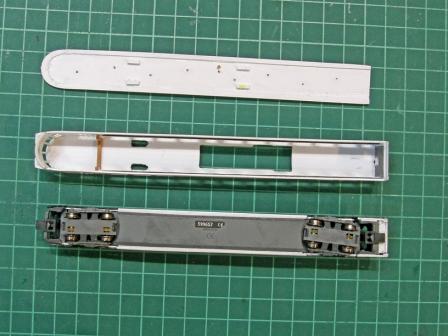
In 1991 the Fleischmann model received green
painting. CFL lettering and yellow Microscale decal stripes had been
applied. In 2022 I installed 3Dprint4Moba bogies. A long Modellbahn
Union standard coupling was plied upwards and its peg was shortened.
Inside I installed LEDs. An additional hole was drilled into the
angle irons of all the coaches in order to fix LEDs into the
compartments of the coach ends. A magnetic coupling is providing
current. I painted the seats in blue and in red and glued figures
upon.
|
||
| to the top | |||
 |
 |
||
|
Minitrix Turnouts |
|||
 |
 |
||
| to the top | |||
|
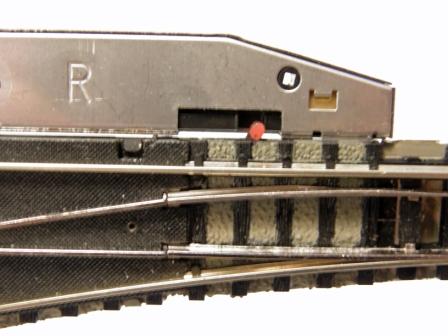
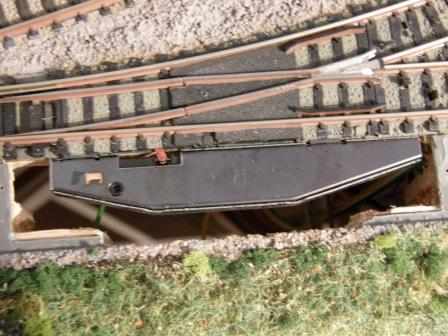
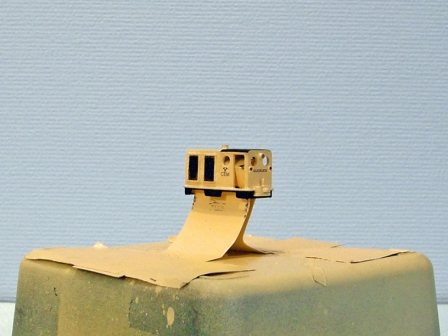
The point motor is turned the other way round by
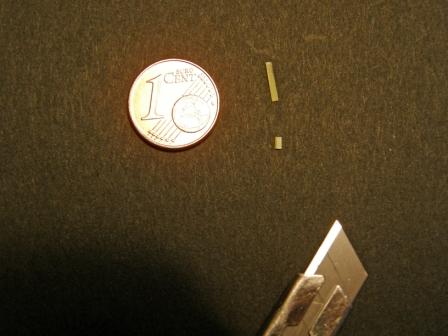
putting a right motor on a left point. As the small red lever is not deep enough, the motor
slides underneath. The point does not change its position.The turned point shows the small red lever. A thin and tiny plastic sheet is made with a cutter.
It is glued with a drop of instant glue on a pin.
|
 |
||
 |
 |
||
| to the top | |||
|
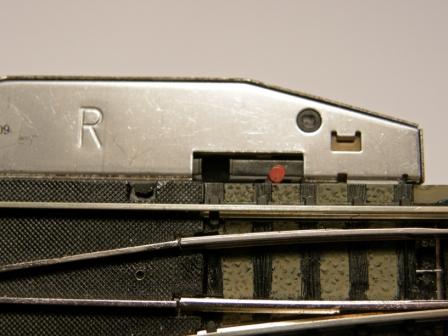
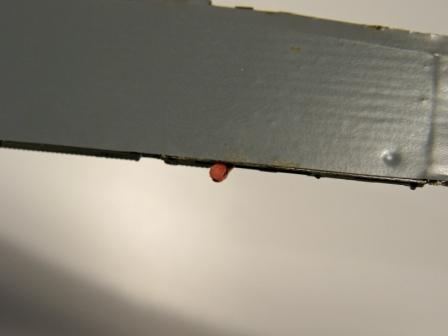
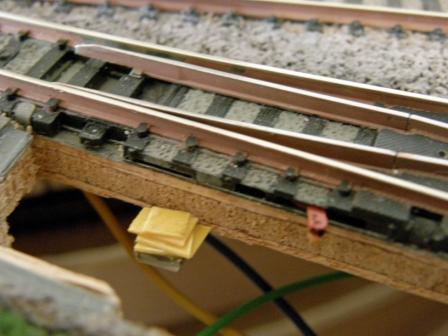
The point is weathered and installed. You can see the
tiny yellow sheet under the red lever. In order to stabilize the point motor, a support is
installed and adjusted with the help of grey and yellow sheets. The installed motor
lies in a perfect horizontal
position. It works reliably. I made point levers out of wire and
plastic parts. After this, the camouflage sheet is screwed on top of the hole.
|
 |
||
 |
 |
||
|
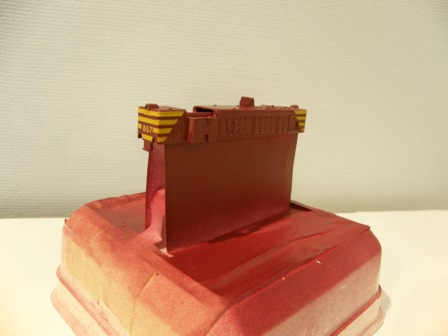
Locomotives of the Series 450 |
|||
 |
 |
||
| to the top | |||
|
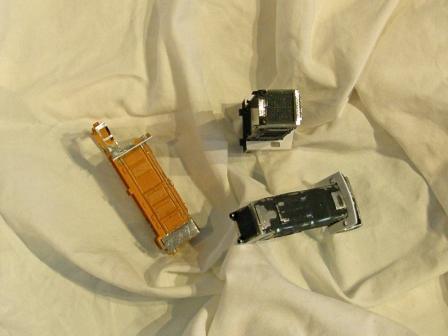
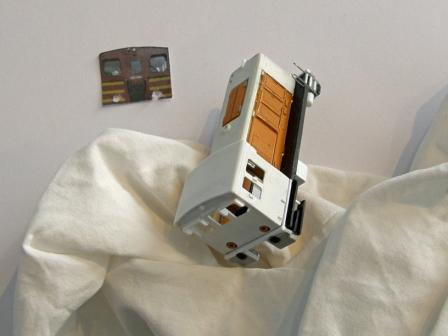
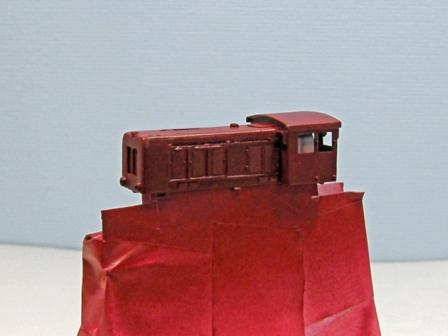
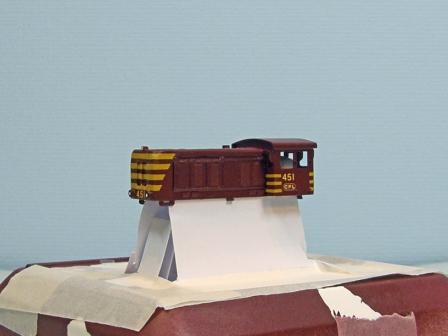
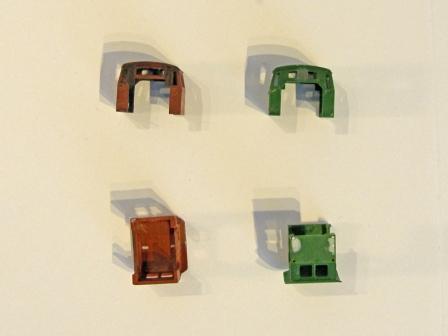
At the Diesel Festival in Fond-de-Gras I had
taken photographs of the original from all sides. I took them into a
Word document. I mesured the lenght and the width of the Minitrix
V36 model. I added lines with these mesures as autoshapes into the
document. I adapted the size of the photographs to the lines. Thus
I could print the photographs in N-shape. From the Minitrix
locomotive I removed parts of the roof, the sides and the back of
the cabin with my cutting disc. With the help of the back
photograph I cut and limed a gauge of plastic to manufacture the
new cabin.
|
 |
||
 |
 |
||
| to the top | |||
 |
 |
||
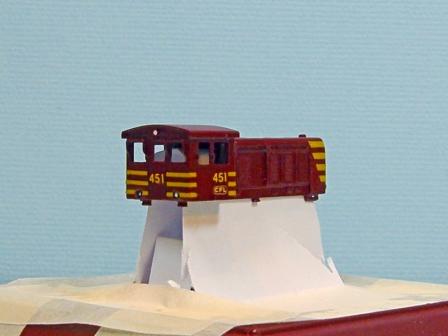 |
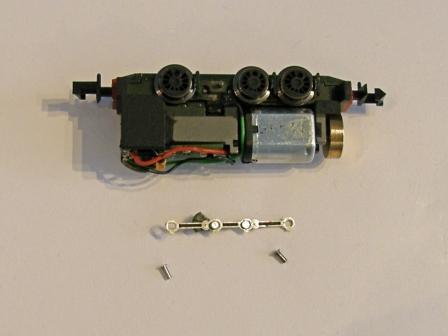
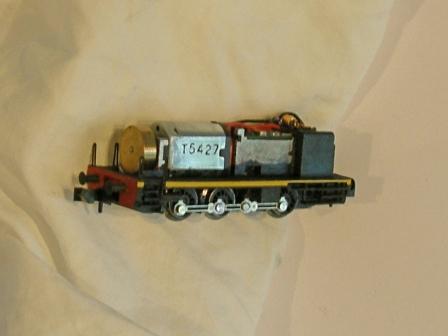
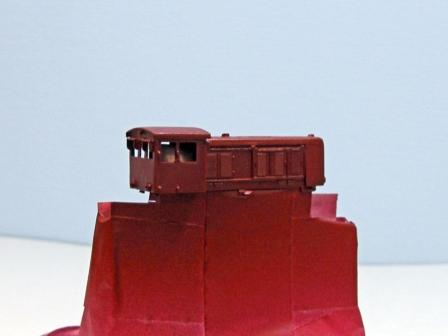
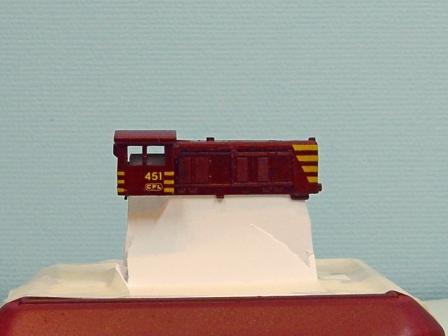
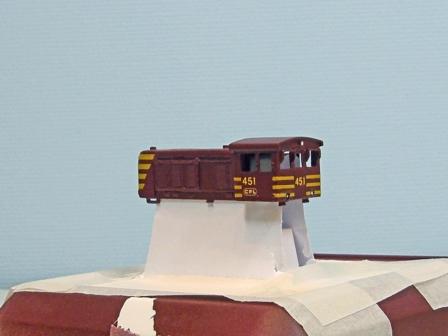
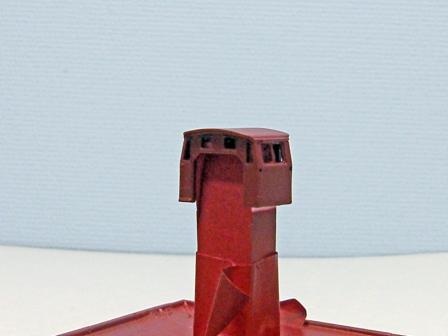
The body was altered using Evergeen items. I
filed the chassis at the places where te body has to be placed and
painted it in black. From the connecting rod I removed the central
bolt, cut the head off and fixed it with instant glue upon the rod.
Thus the whole system wedges less and the engine runs smoother. I
decorated with Plastikote spray, Microscale and Druckeronkel decals.
I bended the railings out of 0,3 mm wire and fixed them with instant
glue. The buffers come from my altered Roco/Fleischmann Brissonneau
engines.
|
||
| to the top | |||
 |
 |
||
|
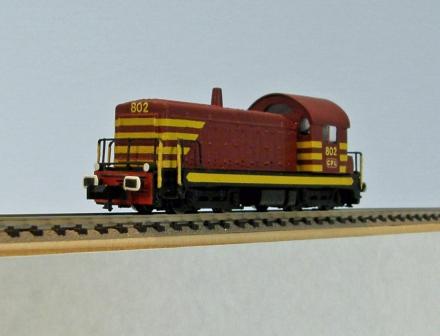
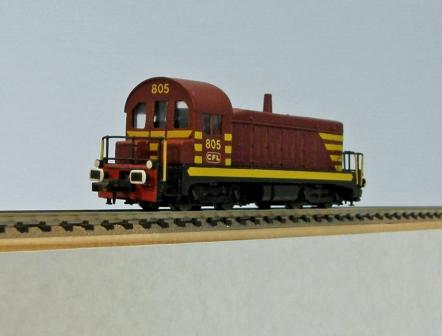
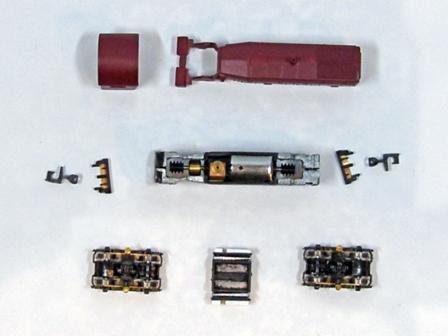
Locomotives of the Series 800 |
|||
 |
 |
||
| to the top | |||
 |
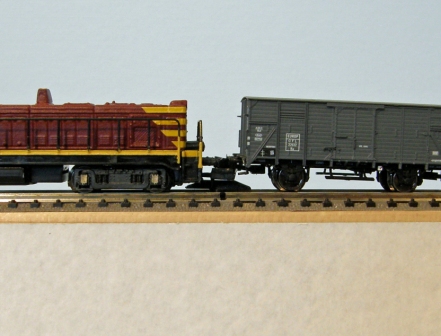
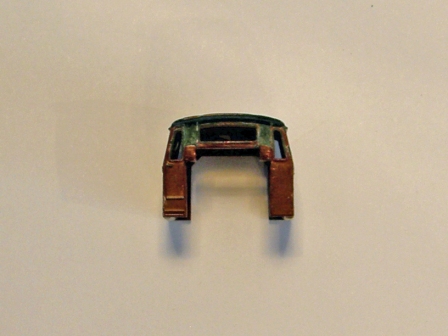
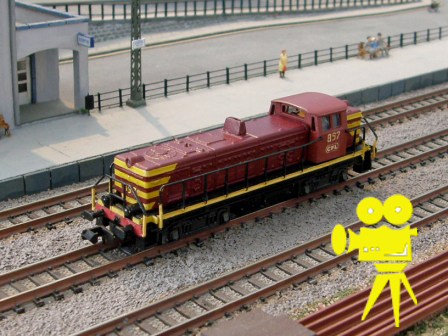
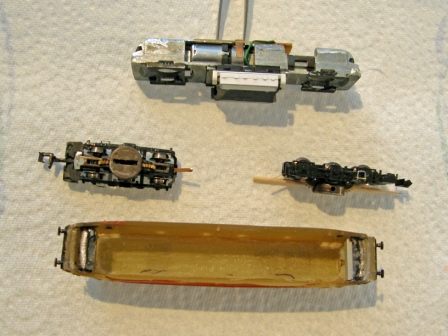
From the Arnold 5114 model I only used the body,
the wheels and the couplings. The body received a cabin out of 0,25
mm plastic sheets. It was decorated with Plastikote 22105 and Microscale 87-1061
as well as 70106 decals. The logos were developed by Decalo de and
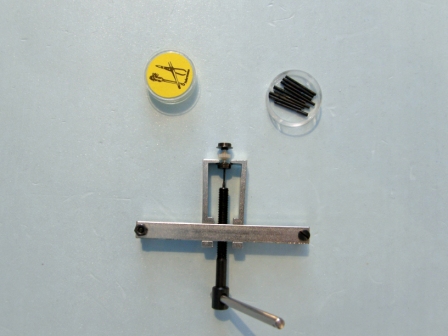
printed by Druckeronkel de in high-end digital quality.The couplings were cut, filed and put together
with instant glue. With the help of Fohrmann tools, I put the wheels
upon the axles of the HN2259.
|
||
 |
 |
||
| to the top | |||
|
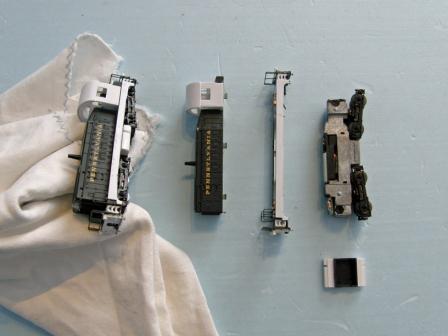
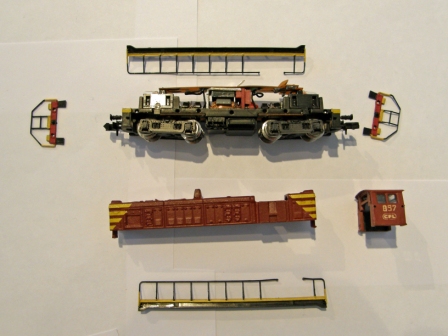
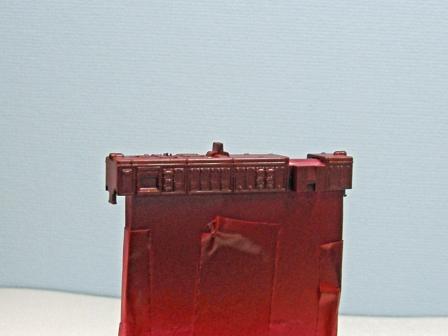
I covered the chassis of the HN2259 at
the sides and at the ends with 0,25 mm sheets. For the stairs I
filed and glued Evergreen 153. The lamps are Evergreen 222. The tank
was created with Evergreen 248 and 153. The chassis was
decorated with Platikote 22100 and Microscale decals. The buffers
are
Kato K2880-25B.
I could use the Lifelike models 7867 and 7868 integrally. From the zinc chassis I removed a part at the rear. The door in the middle of the cabin has to reach the chassis. |
 |
||
 |
 |
||
| to the top | |||
 |
The hole in the chassis floor was filled
with small plastic sheets at this place. The sides and the ends of
the chassis were covered with 0,25 mm sheets. The stairs, the tanks
and the lamps were made out of Evergreen elements. The body received a
new cabin of 0,25 mm sheets. The models were decorated as formerly
described. I removed 1 mm from the top of the Rapido couplings, so
that they couple more easily with other vehicles. At my new 804 I
put more weight into the tanks and the cabin using sheets of lead.
|
||
 |
 |
||
|
Locomotives of the Series 850 and 900 |
|||
|
The Formula Sports Roco locomotive 210116 received a new, self-made, plastic chimney. The decoration stripes
were removed with nail varnish remover. On the cabin I shut the
inferior holes for the railings with Humbrol Modelfiller. The body,
as well as the cabin,
were painted wine red with Plastikote 22105 spray. The new stripes
are Microscale New Haven 87-1061 decals of 5 inches. The numbers are
Microscale 70106 Gothic Railroad Letters and Numbers Yellow. They
were placed with Micro Set and Micro Sol. A transparent satin coat
of Plastikote was applied upon.
|
 |
||
| to the top | |||
 |
 |
||
 |
From the railings I removed the inferior crossbeams with my miniature
pliers. At the front and at the back their inferior part was painted
in yellow. On the chassis I put small yellow stripes with decals
near the stairs. Drim 3D buffers have been installed. The motor
coals have been replaced. The collector, the gearwheels and the
sliding contacts of the wheels and the bogies have been cleaned. The
worms and the gearwheels have been oiled. The five pole motor turns
rather slowly now and the slow driving performances are quite good.
For optical reasons, I put Fleischmann 53717400 wheels.
|
||
| to the top | |||
 |
 |
||
 |
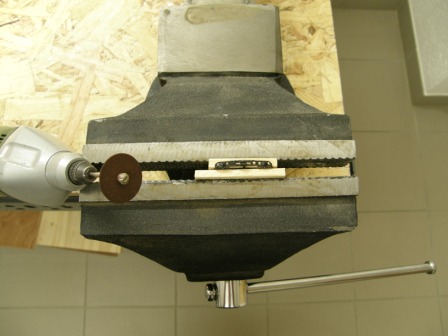
Using the same method I also altered the 851 and
903. For the chimney I used an Evergreen 188 Strip, into which I
drilled holes with my Proxxon. After this I used the file on it, so
that it became slightly inclined to the top. The driving
performances of the 851 were bad in spite of the 5pole motor. The
gears of one of the bogies were jaming. One wheelset was not large
enough and therefore had no lateral play. With Fohrmann special
tools I tore the wheels slightly apart. My second MBM 854 received a
black chassis from the Fleischmann 931604, which was available
in 2017. Adapting the cabin, I used the file on the roof and on the
ancient chimneys.The holes for the lower crossbeams of the railings
were closed with Humbrol Modelfiller.
|
||
| to the top | |||
 |
 |
||
|
Certain engines of both series had boilers, which
were removed in later years. Afterwards the rear cabin windows were
seperated in the middle. The gasoline tanks were different too. For
my latest alterations I tried to take these details into account. As
always I used Evergreen profiles and sheet. The buffers come from TJ-Modeles.
The decals are Microscale and Druckeronkel. Only a few CFL engines
had doors at the front side of the motor hood. This led me to work
with the file.
|
 |
||
| to the top | |||
|
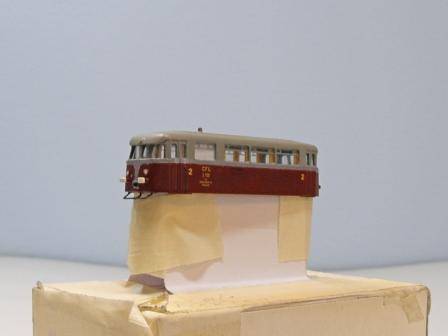
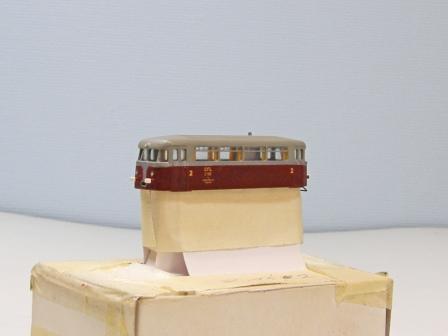
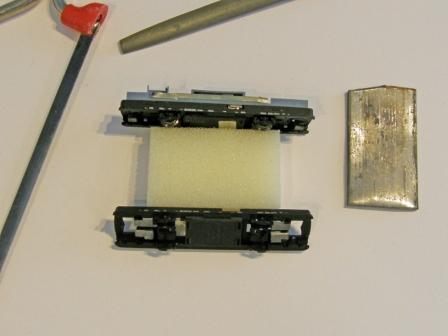
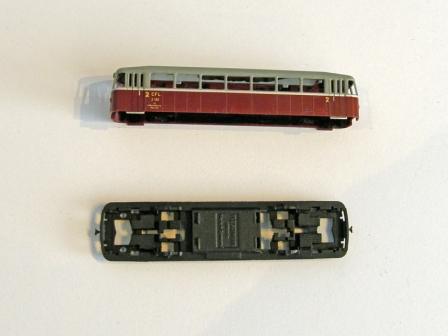
Motorcoaches of the Series Z100 |
|||
 |
 |
||
|
|
|||
|
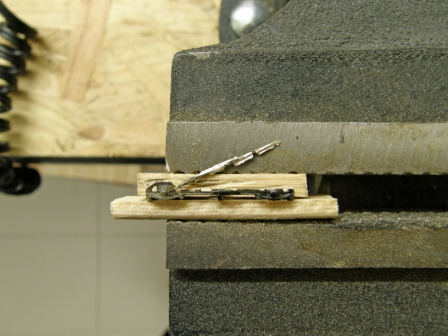
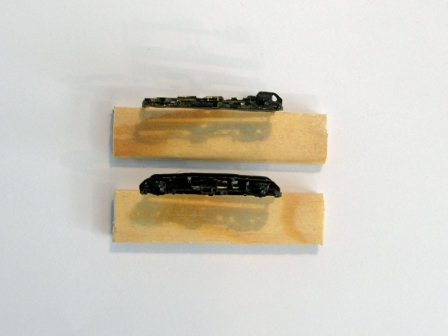
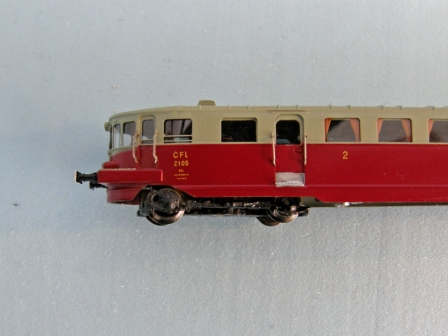
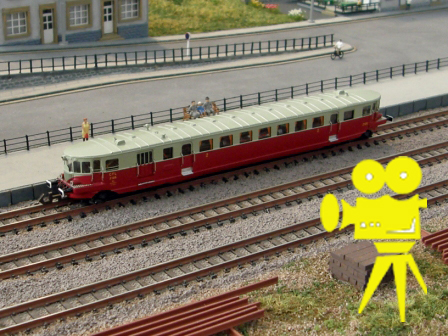
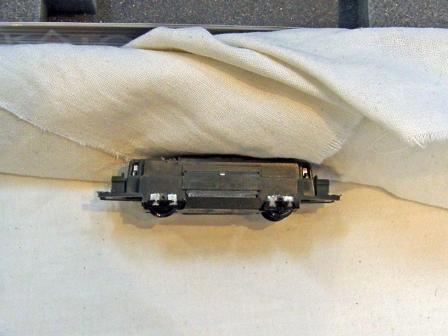
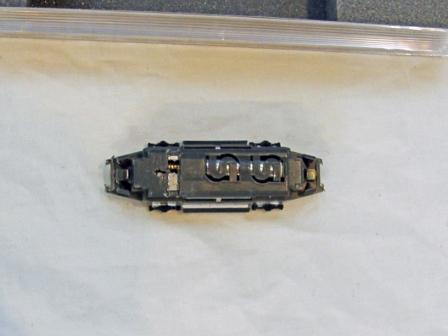
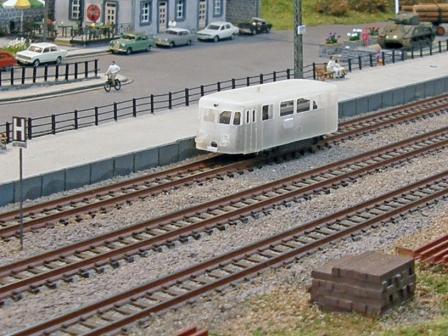
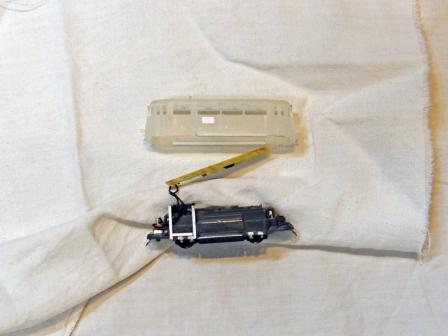
The Guarniero model N-D003 of the 105 motorcoach
was at that time unable to run on the radius of my track spiral.
Therefore I had removed the bogie flancs. In 2016 Guarniero offered
an edition with altered bogies. I inspired me on this. The upper
parts of the bogies were cut with my Proxxon cutting disc and filed.
In the bend neither the bogies nor the wheels are to touch the body.
Afterwards the bogies received a black colour coat with the paint
brush.
|
 |
||
| to the top | |||
 |
 |
||
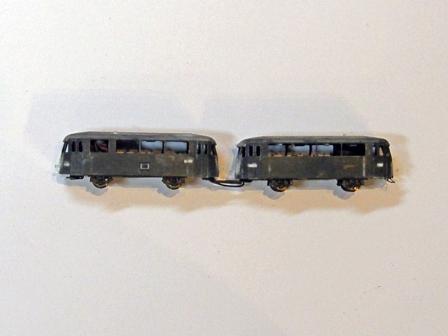
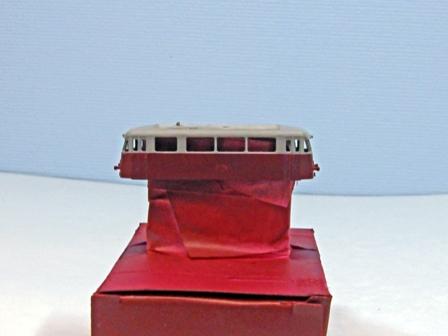
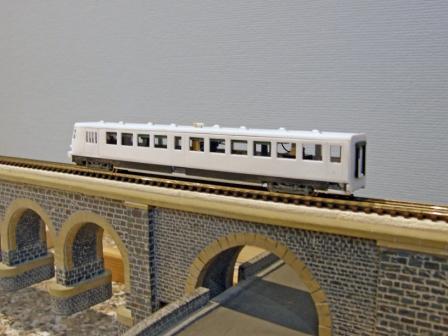
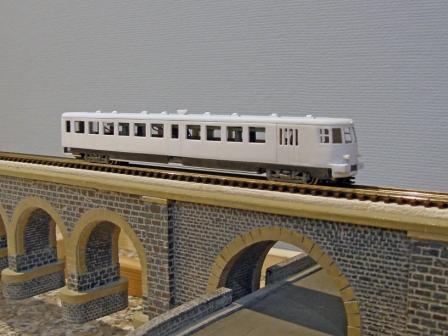
| Railcars of the Series Z150 and trailers of the Series RZ1050 | |||
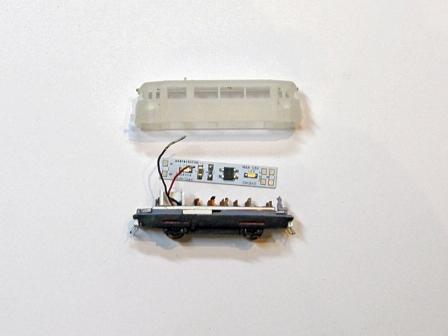
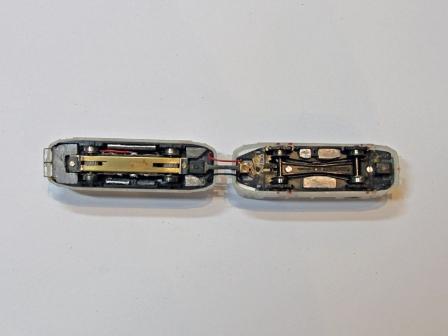
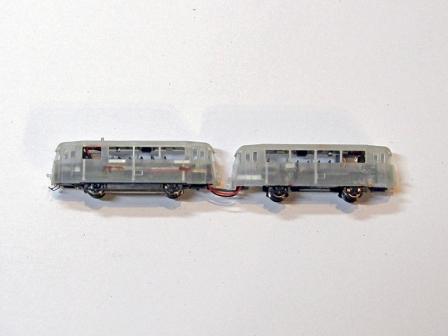
|
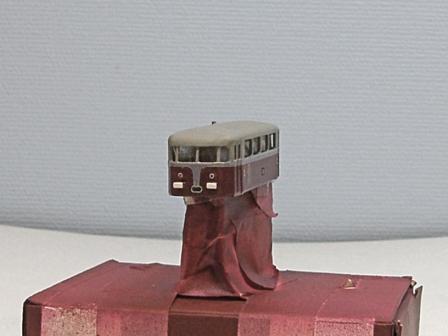
At Shapeways I ordered 3D bodies. These are
models of the trailer. For the use as a railcar I glued a funnel out of a
sawn toothpick, 2 brass tubes as 3. frontlight, 2 plastic sheets
beneath the filed out coupling holes and a grate under the window
next to the toilet. As a chassis, the one of the Kato14-071-1
steetcar, was built in. I shortened it an glued sheets and spring
imitations at the sides. On top, a part of the coat was sawn out in
order to solder cables.
|
 |
||
| to the top | |||
 |
 |
||
 |
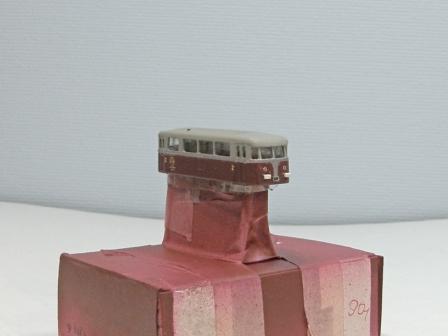
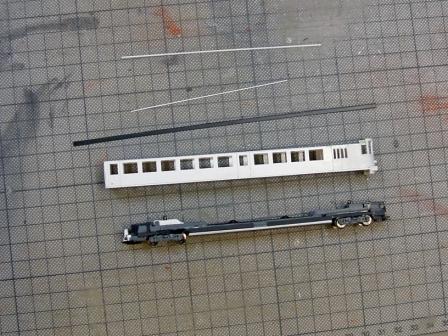
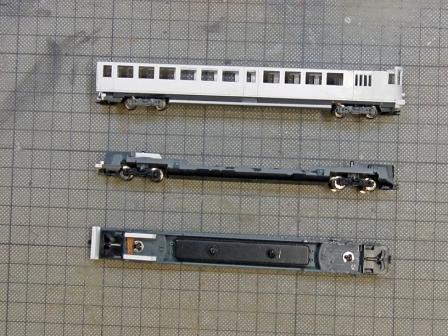
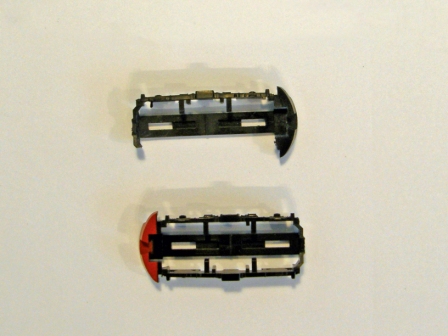
With glued on sheets I made the toilet
cabin. A switch for the N car System was inserted diagonally into the
chassis, which was lenghtened with plastic sheets and adapted to the body. As lighting I
use the Sabene-Modellbau SMIB45 item. It is fixed to the body
roof by Evergreen profiles. To the chassis, rail clearers out of 0,3
mm plied wire have been fixed with instant glue in gel.
|
||
| to the top | |||
 |
 |
||
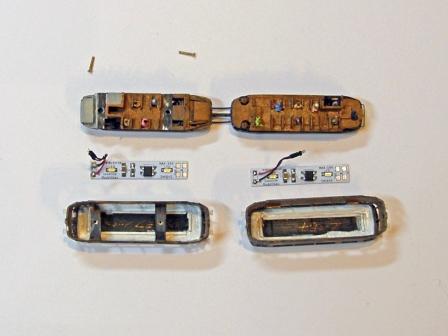
|
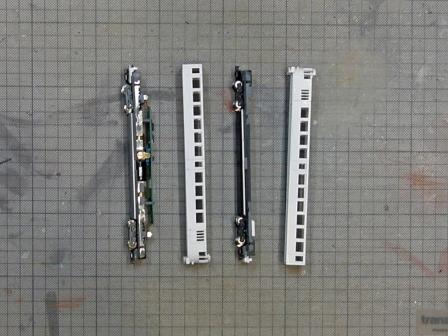
For another railcar, I sawed and filed on the
chassis of a Fleischmann trailer. The SB-Modellbau motor 42014 was
fixed by screws and nuts beneath a thin sheet. I made the interior
out of styrene parts. Lead plates bring more weight. I also glued
rail clearers made of wire. A light board will be soldered. Behind
the doors of the body, I glued small Evergreen stripes to establish
the correct height.
|
 |
||
| to the top | |||
 |
 |
||
 |
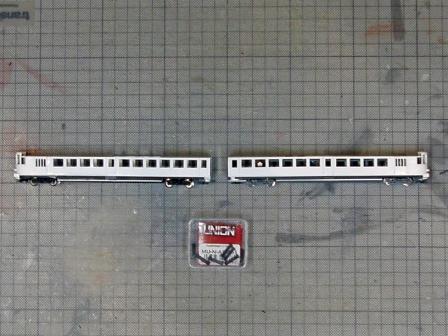
I built a railcar unit with permanently fixed
trailer combining Fleischmann and SB-Modellbau elements. Between the
vehicles I maintained the Fleischmann kinematics. At the end of the
unit I originally installed a Peho shaft. The Fleischmann coupling bars have
been thinned by filing. I soldered cables with microplugs to the
light boards.These are lodged in the toilets. Thus the bodys may be easily removed.
|
||
| to the top | |||
 |
 |
||
|
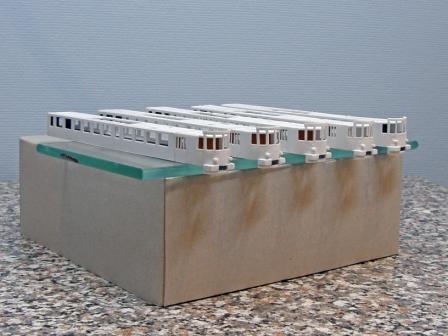
I made another railcar unit without a motor using
Fleischmann parts. The chassis and interior fittings have been
painted with Humbrol colours. I shortened miniature figures of many
manufactorers and glued them inside. The bodies will be painted in
black, white, brown and grey inside.
|
 |
||
| to the top | |||
 |
 |
||
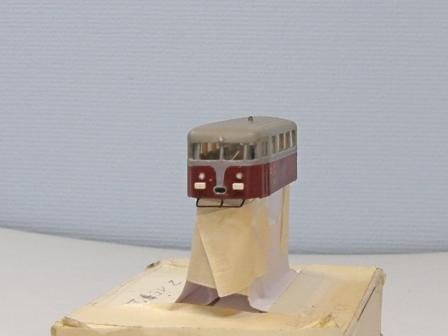 |
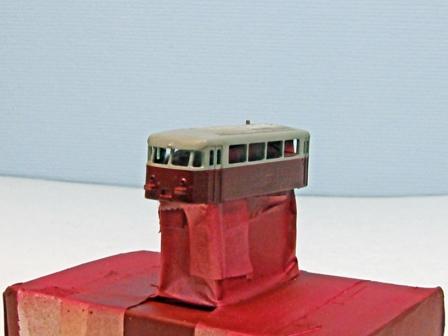
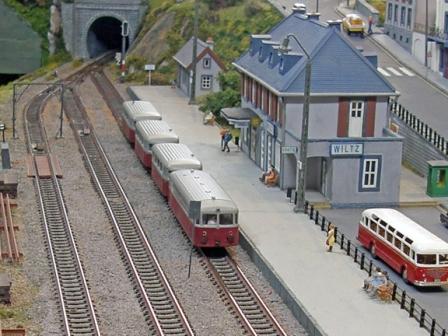
I painted with Plastikote 22105 wine and Humbrol
64. Yellow lettering, silver stripes and window aerators are self
designed decals, which were printed by Druckeronkel. After I had
applied them to the body, I sprayed transparent satin
Plastikote. Yellow Busch plastic sheets have been glued as curtains.
I put flexible transparent stripes behind the front windows. For the
other windows, rigid sheets have been placed upon the curtains.
|
||
| to the top | |||
 |
 |
||
| Railcar Z161 and Trailer RZ1061 | |||
 |
 |
||
| to the top | |||
 |
I only painted the top of the Fleischmann 74025
model in grey. At the bottom the DB inscriptions where removed with
very fine sandpaper. By Adobe Illustrator I created the CFL
letterings as vector graphics and had them printed as decals by
Druckeronkel. The
lateral windows are Piko ET40251-16 from the online shop. The weight of the chassis was increased by additional
lead sheets as the Z161 has to pull 3 trailers up the helix.
|
||
 |
 |
||
| to the top | |||
|
I bent the contact sheets of the trailers so that they press more
firmly against the wheels. Thus the electrical contact has been improved.
In order to make exchanging the trailers easier, I bent a hook out
of wire and fixed it so that it can vertically rotate. Thus the railcars may
simply be linked to the trailers from the top.
|
 |
||
 |
 |
||
| to the top | |||
 |
I painted the Shapeways body with Plastikote spray and Humbrol
Enanmel colours. The silver parts are self-developped decals. The buffers
were painted with Humbrol white colour.
A transparent coat was applied as a finish.
|
||
 |
 |
||
| to the top | |||
|
Motorcoaches of the Series Z200 |
|||
 |
 |
||
|
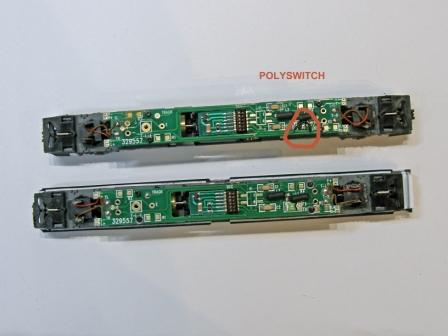
I use the chassis of the Minitrix 12793
motorcoach. Wheels with tires have been replaced and all axles have
brass cogwheels. When I could not find original Minitrix axles, I
mounted Karin Hegermann U031/8802 items. The chassis have been
extended by 3 mm at the rear. At the front I shortened them by 1 mm
and filed them slightly on the sides. At one Minitrix circuit board
I had to bridge the polyswitch by soldering a small cable.
|
 |
||
| to the top | |||
 |
 |
||
 |
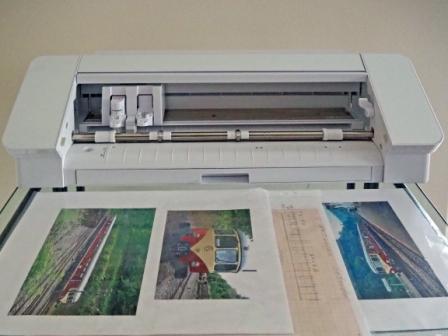
To make the bodies I used a
Silhouette Plotter. Evergreen sheets 9010 and 9511 of 0,25 mm have been cut. 3
boards are glued one upon the other using Tamiya
87038 cement.
The noses consist of three sheets with an additional length of 0,5
mm for each. They have been plied on a gauge and glued one upon the
other.
|
||
| to the top | |||
 |
 |
||
|
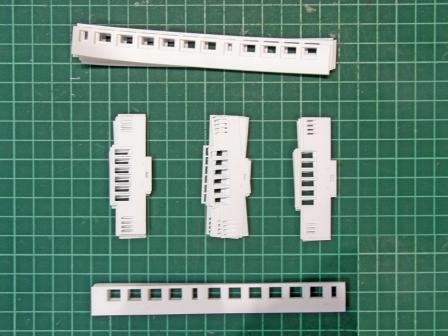
In order to fix the noses and the sidewalls, I
cut a 1 mm roofboard with the cutter and rounded it at the front by
filing. A hole for the Minitrix circuit board has been installed.
The roofboard was fixed 1 mm backward. Thus the front windows
of the noses have a slight inclination. To fix the front buffers, I
filed Evergreen boards and glued them outside the noses.
|
 |
||
| to the top | |||
 |
 |
||
 |
The roof is a 1mm plastic sheet that was rounded
by filing the front. Around I glued an Evergreen quarter round strip
of 1,5 mm. The roof aerators are 1mm half round and 0,5 mm Evergreen
strips. The chimney is a wooden toothpick. The 3 parts will later be
painted in black, wine-red and grey. In the end they will be fixed
together.
|
||
| to the top | |||
 |
 |
||
|
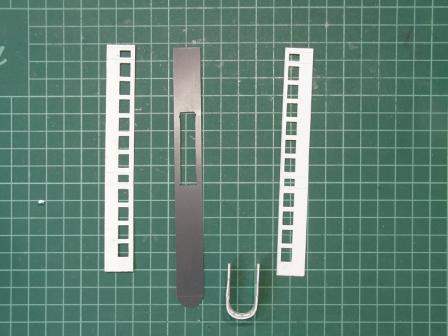
The Minitrix train consists of 3 vehicles. The
middle part has a motor and is slighty modified. Out of the other 2
vehicles I made a chassis with 2 couplings using a saw and instant
glue. To cut thicker plastic boards I use the Micro-Mark "Duplicate it".
|
 |
||
| to the top | |||
 |
 |
||
 |
To link both "Westwaggon" parts, I use the
Modellbahn-Union N-A50055 bars. As bellows Roco parts 98443-NK,
purchased at Spur N Teile DE are used. I am about to design the
letterings with Adobe Illustrator.
|
||
| to the top | |||
|
Locomotives of the Series 1800 |
|||
 |
 |
||
|
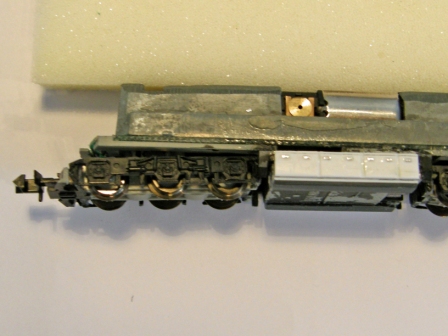
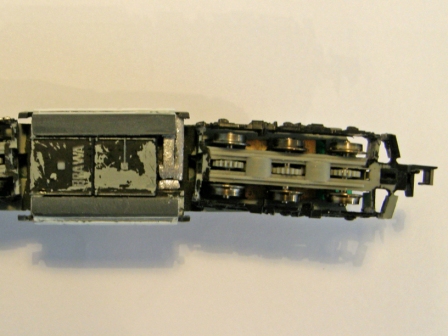
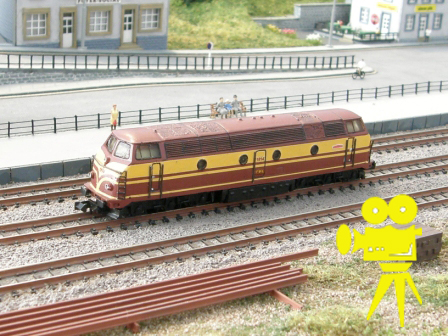
My MTE 1814 model has a grey chassis from the Brawa 61123. The
wheels with pneus were replaced by 0008765.00. I removed the bogie
flancs. In the Märklin online shop I ordered the item 305216
for the Minitrix Nohab. I cut, filed and glued it on to the Brawa
bogies. On the down sides of the Brawa chassis I glued 1 mm Busch
plastic sheets. I adaptet their size with the file to the MTE resin
body. I imitated the fuel tank beneath the loco with 0,3 mm Evergreen
sheets. Sparerooms underneath the chassis were filled with lead
sheets. Everything was painted with the brush and Humbrol enamel
colours.
|
 |
||
| to the top | |||
 |
 |
||
 |
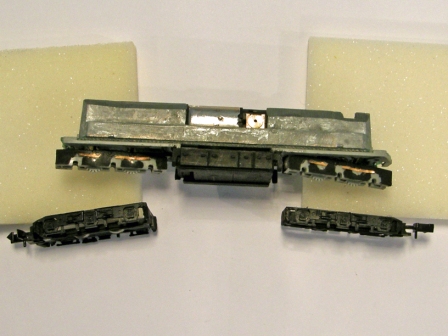
With the 1803 I proceeded to almost the same
alterations on the shorter Minitrix 2020 chassis. I sligtly
lenghtened the bogies to the front. Longer couplins 0291-10 for the
Arnold Uerdinger were installed. Small Evergreen 0,3 mm
sheets were fixed at the front and at the sides with instant glue.
Afterwards the hollow spaces were filled with Stabilit Express and
filed. On the sides of the bogies I fixed stairs made of 0,3
mm wire underneath the doors of the body. Inside the resine body I glued thin plastic sheets until it
fitted perfectly with the chassis. With thin stripes of adhesive
tape for photographs and cardboard the body was fixed upon the
chassis.
|
||
| to the top | |||
|
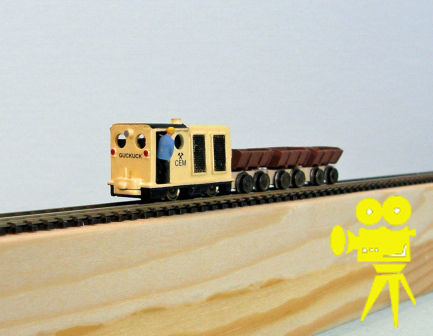
The Quarry Railway on Z Track |
|||
 |
 |
||
|
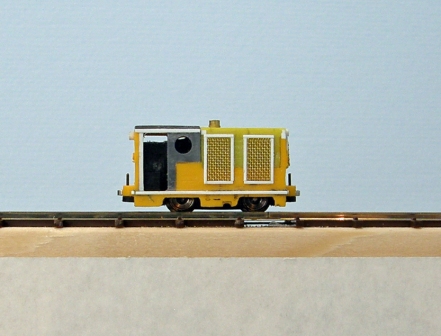
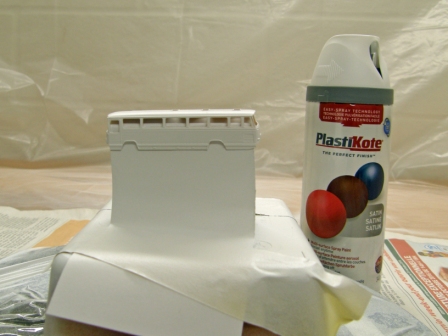
I built the locomotive using the B60 Busch
model. The cabin was made of Busch sheets into witch I filed windows
and doors.The ventilation grilles were made with the help of
Evergreen stripes and wire mesh. The chimney is a brass pipe. The
model was painted with Plastikote spray. The letterings are
self-made decals. Because of the Busch magnet system metal sheets
have to be placed underneath the tracks.
|
 |
||
| to the top | |||
|
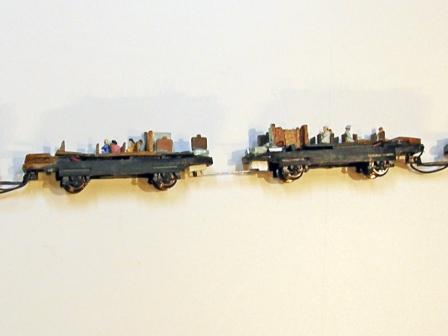
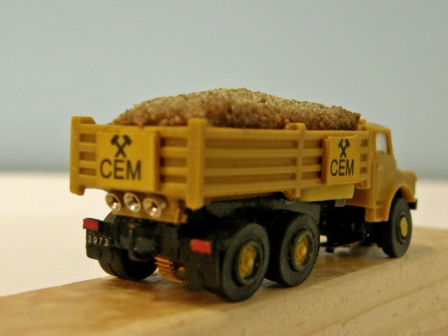
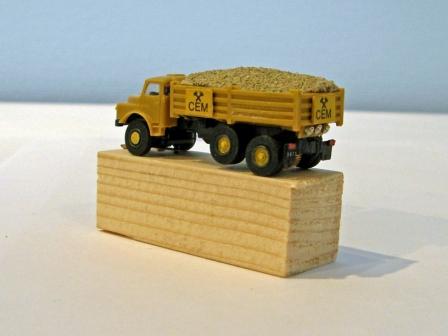
The lorries were completey built out of
Evergreen stripes and sheets. They were painted by the brush with
Humbrol colours.The peaks of the Märklin 700810 wheels were abraded
by the Proxxon. They were burnished and because of their weight, the
vehicles run very well. With hooks plied out of 0,3 mm wire the
locomotive and the lorries are tied together.
|
 |
||
|
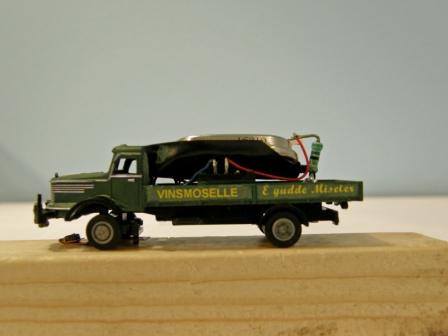
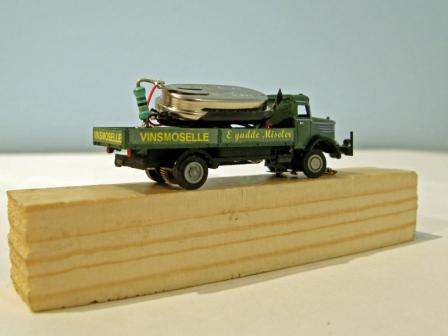
The Faller Car System |
|||
 |
 |
||
| to the top | |||
|
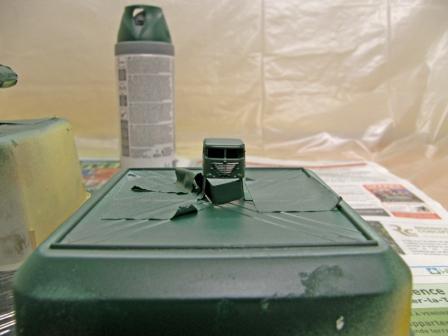
The 162004 lorry was altered in
order to deliver wine from the Moselle to the people. I filed a Lemke Krupp
Titan cabin until it fitted the Faller chassis. I painted
my first alteration with the paint brush. The inscriptions were
made in the Word programme of the PC. I printed
them by ink-jet on white self-adhesive Micro Application
film and on transparent Microscale decals. I placed them on to the lorry
using
Microscale products. In the end I sprayed a coat of Plasikote
Clear Sealer.
|
 |
||
 |
 |
||
| to the top | |||
 |
 |
||
 |
 |
||
| to the top | |||
 |
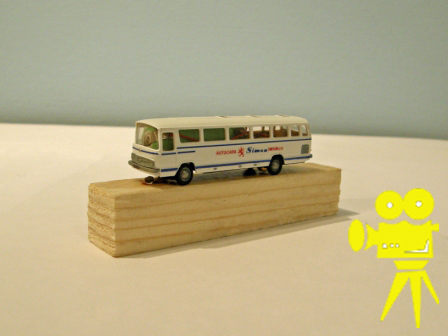
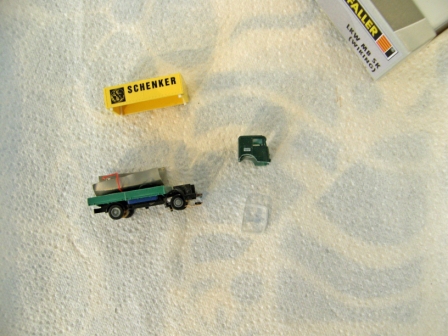
The Faller 162046 lorry received a few paintig
improvements with the paint brush. The inscription is a self-adhesive Micro Application film. All the cars received license plates. They were
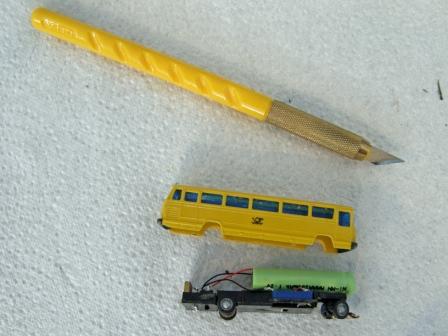
made with Adobe Photoshop. I sprayed the Simon bus with
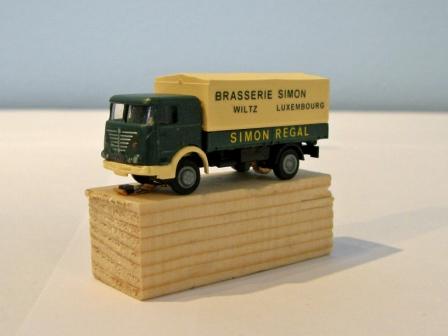
Plastkote and lettered it with decals.The beer lorry is the Faller
162051 item. Again I filed on the cabin of a Lemke Büssing. The
lorry was sprayed in two colours with Plastikote. The lower
inscriptions are single letters of the Microscale programme.
|
||
 |
 |
||
| to the top | |||